Tuesday, January 31, 2012

School Photo Dress


This past weekend I was given a sewing weekend ~ I sewed & sewed & sewed in my studio and I was in the zone... I finished this School Photo Dress AND started & completed 3 sewing projects (which I will blog about real soon). So after finishing 4 sewing projects I have a huge sense of accomplishment !!!

I am so embarrassed to say that this has been on my list of things to sew for way too long. I purchased the pattern well over a year ago & I was planning on sewing it last October during Kid's Clothes Week. Anyway, now it's finally done. The difficulty level on this sewing pattern is 3 out of 4 scissors, I believe that's the highest I've gone with Oliver+S patterns... I installed my first invisible zipper !  What really drew me to this design was the kangaroo pocket. It's hard to see but the fabric is a check pattern brown with pale pink. I would like to sew another one with completely different fabric as I'm such a fan of this design !

Thank you for dropping by and checking in on my humble little space.

PS OK this is the part where I share how much it cost to make, but unfortunately I don't have all the details since I bought the invisible zipper & lining fabric so long ago, I don't remember. But the fabric was free because it was a gift I received & the sewing pattern was $15.95 (btw, any Oliver+S patterns are totally worth the investment, so never hesitate to buy one!!!)

Monday, January 30, 2012

Sleigh Ride Outerwear Tutorial

 Today I bring you the Sleigh Ride Outerwear Tutorial !

How this all started was I wanted to make a white winter coat with some kind of soft texture & fluff, you know, like snow. I also wanted it to be very wearable, something that could be worn outside, or course. When I took the photos of my daughter wearing it we were at an outdoor shopping area (while we were there, people were walking around & I heard someone 'oh, look at that little girl' so I hope that's a good sign). I was also thinking something chic, something that could even be worn in Paris, walking down the Champs Elysees?
 Besides sewing I also knit, so you will sometimes find me in the yarn section at Michael's ~ that's where I discovered doodle yarn... have you touched this stuff yet ??  It is SUPER DUPER SOFT & very chunky for yarn. I tried using the doodle yarn as the trim for this ensemble & it worked !  So here's how I put this look together...

I had 1.3 yards of ivory fleece (which was more than enough for a size 4 jacket with mittens & ear warmer), 1 ball of cream doodle yarn, & 4 ivory buttons.
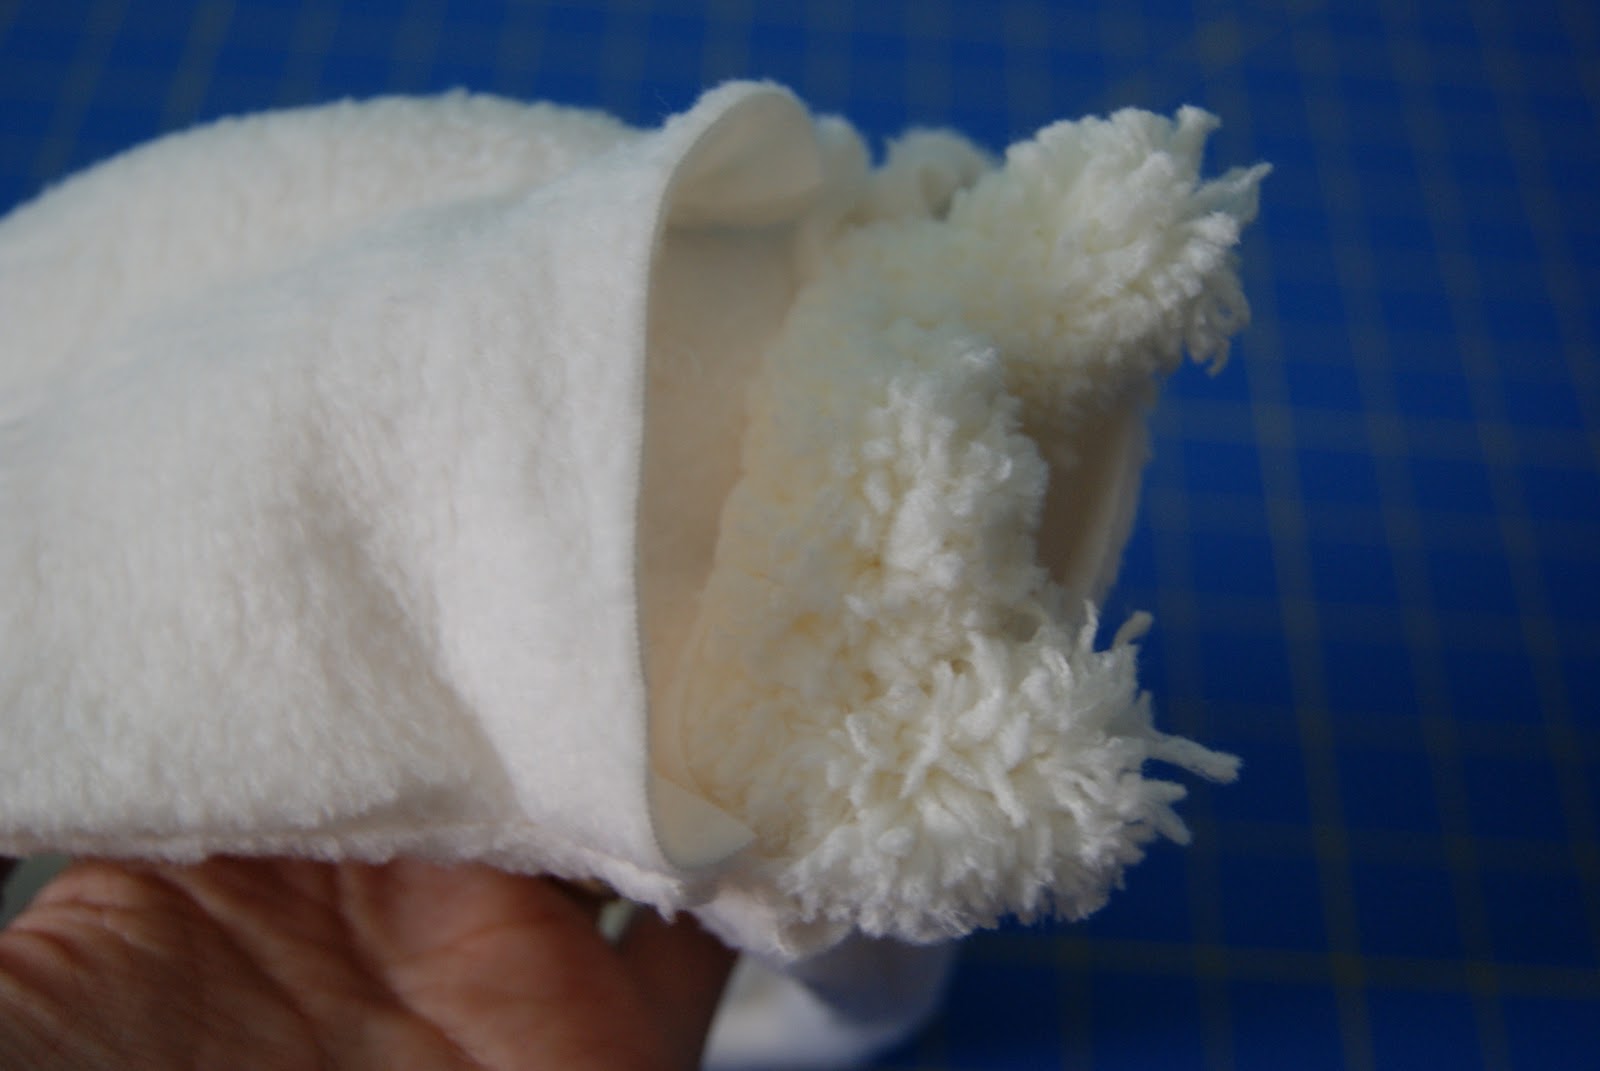
 I zigzag stitched the doodle yarn onto the fleece with the widest & longest stitch possible. Even though it's zigzag stitched down, the doodle yarn still remains really fluffy.
Something you must know about doodle yarn is that it frays very easily so the key here is to tuck under all the ends! First attach the doodle yarn to the fleece before sewing up the final seams.
 :: take your favorite jacket pattern, I used the Abby Jacket (size 4), extended it to the knee by adding about 5.5 inches
:: I only used the ivory fleece for all the fabric pieces on the jacket (no contrasting fabrics used)
:: I added on seam side pockets by following this tutorial
:: I attached 2 rows of doodle yarn to the back of the collar as well as to each of the 2 cuffs, & 6 rows to the bottom of the jacket (I went up as far I could until I hit the pockets, but I think it would look cool if it had even more rows)
:: the button hole maker function on my sewing machine is no longer working so I followed this video: Making a Button Hole Using a Zigzag Stitch


 :: mitten pattern is from the Oliver+S little things to sew book
:: I attached one row of doodle yarn to each mitten above the elastic casing
:: I added a .5 inch to the length so I could fold under a .5 inch & create a seam similar to the Abby Jacket (the mitten pattern calls for zigzagging the raw edge)

 :: for the matching ear warmer cut out 2 pieces 4.5" X 21"
 :: cut 2 pieces of doodle yarn 23"
 :: zigzag stitch (using the widest & longest zigzag stitch possible) doodle yarn onto fleece

 :: put the 2 fleece pieces right sides together
 :: sew along long edges 1/2" seam
 :: turn right side out
 :: at the opening with doodle yarn sides together sew 1/2" seam

 :: tuck in in doodle yarn
 :: pin together remaining seam
 :: sew by hand the remaining seam


Voila !


PS Just to give you an idea if you plan on making this ensemble yourself, total cost for making it was: $16.95
1.3 yards ivory fleece $6.66 (it was a 50% off remnant)
cream doodle yarn $6.99 (on sale)
4 ivory buttons $3.30 (w/40% off coupon)
elastic for the mittens was minimal
(I had the white bias tape (for the mittens) in my stash & I reused the Abby Jacket pattern that I purchased in the fall which was $4.95 & I can reuse it again)
I do have some leftover ivory fleece & some doodle yarn, too :)
Good news for you if you don't already own the Abby Jacket pattern, it's currently on sale for $3.95 !!

Sunday, January 29, 2012

Gluten-Free Chocolate & Hazelnut Torte


We baked & ate this gluten-free chocolate hazelnut torte (made without the frosting) this weekend ~ it's from the Sweet and Savory Swedish Baking book. Be warned the ingredients were on the pricey side & it's old school (meaning it was a ton of work!), but worth it because it was for a special occasion ;)

Happy start of the week to you !

Wednesday, January 25, 2012

Sleigh Ride Outerwear

UPDATED TO ADD: the Sleigh Ride Outerwear Tutorial is here !
*****
 {Project Run & Play Season 3 Sew Along}

This week's challenge is Outerwear. It's currently winter here in Minnesota, so I was inspired by: winter, white, fluffiness, & softness. This winter outerwear creation includes a coat with matching mittens & a matching ear warmer. For the coat I used the Abby Jacket pattern (which I've used before, but this time I made a few changes which I'll explain in the future tutorial post), for the mittens I used the mitten pattern from the Oliver+S little things to sew book, & for the ear warmer I didn't use any pattern, I just made it up... tutorial on how I made it coming soon.


Can you guess what embellishment I used to create the texture for these pieces?

Be sure to check out the Project Run & Play flickr group to view all the Outerwear creations.

The fifth week's challenge: Special Occasion/Party Wear

PS I found it interesting that Kate from see kate sew & I both made a coat out of white fleece during Season 3  ! 
I just wanted to share that my sleigh ride coat creation that I started the last few days of December was all done before she posted her winning look :)

Wednesday, January 18, 2012

Octopus Hoodie Tutorial

UPDATED TO ADD: check out the Aug/Sept/Oct 2012 issue of Altered Couture magazine, pages 119-123 where I show step-by-step how I created this, including all the tools & materials needed, complete instructions, as well as some helpful tips.
*****
As promised here is the tutorial on how I made this Octopus Hoodie.
 My 2nd son's favorite animal is the octopus, his favorite color is yellow, & his favorite piece of clothing is a yellow hoodie, so that's where I started. I took a photo of him wearing a hoodie, printed a couple of copies of that photo using a black & white printer, then took a pen & yellow & blue crayons  and came up with these sketches... the hood is the head of the octopus, there are 8 legs coming down, one on each sleeve, 3 in the front & 3 in the back... the 3 in the front & the 3 in the back form letters with octopus leg font that spell out his name !  I picked blue for the undershirt for the water since an octopus lives in the ocean.
 I grabbed 3 shirts: 2 yellow long sleeved t-shirts (one from the closet & one bought at Target for $6.99) & 1 blue long sleeved polo shirt (bought at a children's consignment shop for $8.50)
 I got a piece of paper big enough to cover the shirt
 by hand drew the design & cut it out to make my pattern
 I tucked the blue polo shirt inside one of the yellow t-shirts & pinned them together
 slid a large book inside to make a flat surface for writing
 pinned the pattern to the front of the shirt
 traced the pattern with a disappearing pen
 checked to make sure it looked OK
 I started sewing in the upper left hand corner & sewed one continuous line, following the line I drew

 checked that it looked OK
 I cut off the excess fabric by cutting close to the sewn line


 Then I repeated the same steps for the back of the shirt


 For the sleeves I continued the line from the front of the shirt
 used this pattern for the octopus legs for the sleeves
 sewed down the sleeve as far as I could with the sewing machine, then sewed the end of the octopus leg by hand

 I took a hood that fits my son well & placed it on the 2nd yellow t-shirt as shown
 traced it leaving 1/2 inch for seam allowances

 cut it out
 turned right sides together & sewed it
 pressed the seam open

 I removed the buttons, tags, & collar from the blue polo shirt

 attached the hood to the shirt
 sewed the hood onto the shirt
 All done !
Total cost for making this? $15.49

Happy sewing !